Search Recipes

Wednesday, July 24, 2013

Grilled Beet and Purslane Pesto Pizza

Exciting things have been happening at the Zara household this last week, so I haven't been posting on my blog lately ! So I have some catching up to do, and this seemed like a good way to do it. 

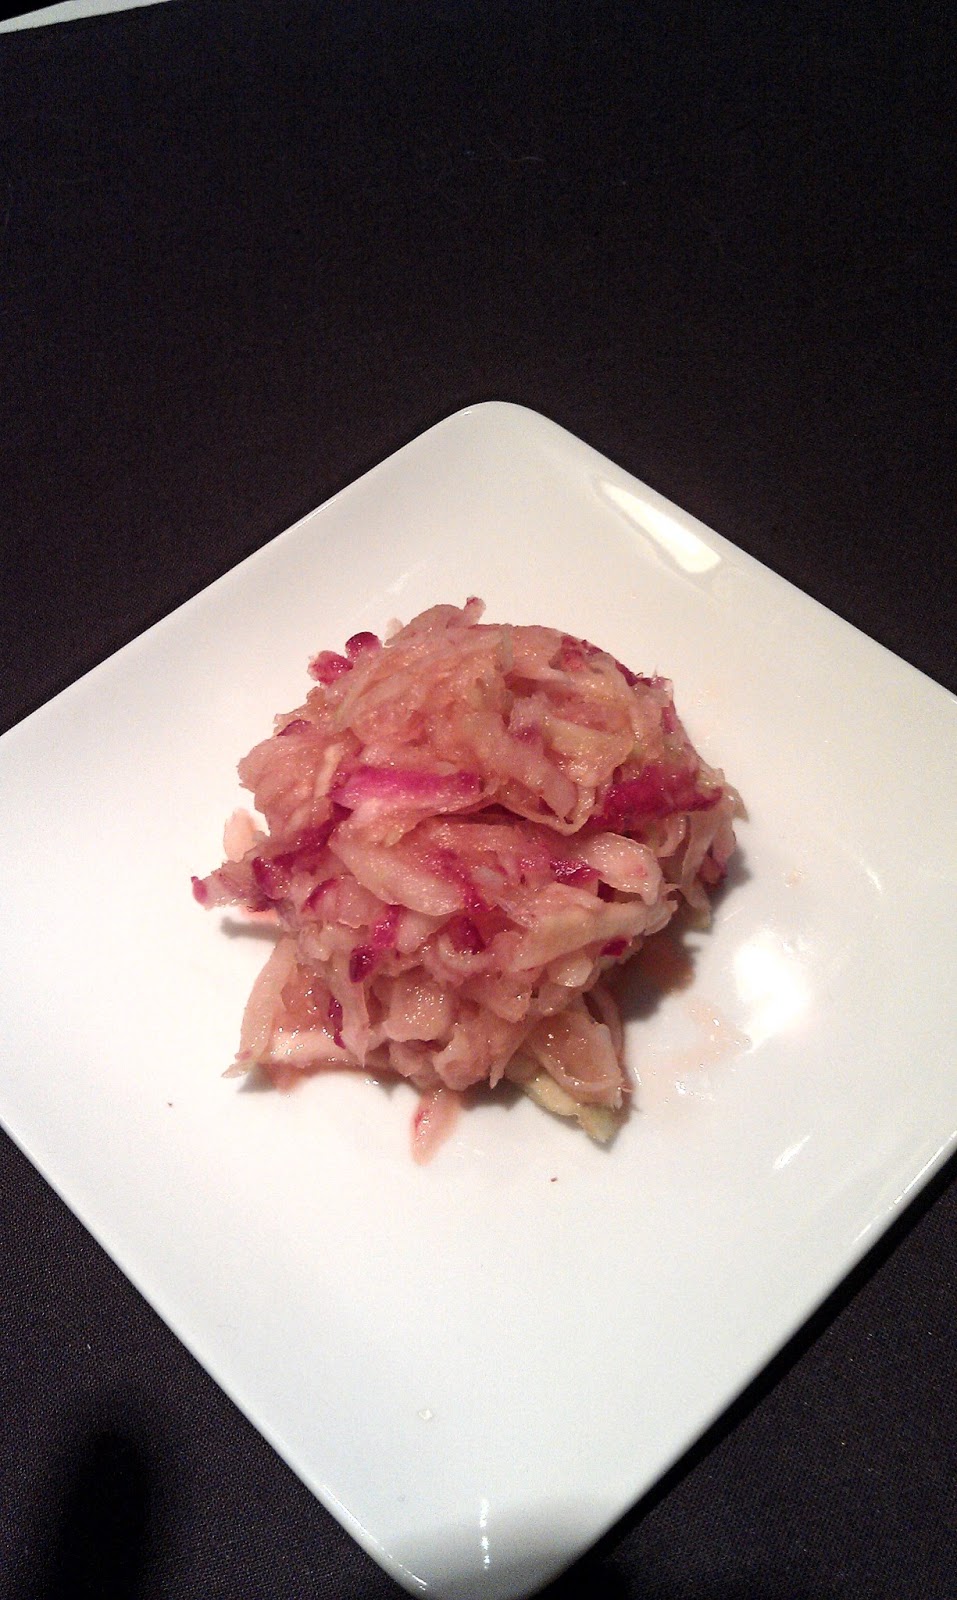
When we got our new CSA box, there was this little bundle of strange greenery I couldn't identify. I checked through the list of what was supposed to be included, and realized I had purslane. Purslane is technically a weed, but is is edible, and has a lemony and somewhat salty flavor. I wasn't really sure what to do with it, so I decided to make a pesto. Why not ? And, we received multi-colored beets, which I love on pizza, so I made this really beautiful pizza, almost entirely from our CSA box. Very cool ! 

Grilled Beet and Purslane Pesto Pizza 
For the pesto 
2 cups purslane (I remove the thick stems, but everything else is usable) 
1/2 cup fresh basil 
4 cloves garlic 
1/4 cup olive oil 
1 ounce shaved parmesan cheese 
Handful of almonds or pine nuts 
Salt to taste 
Place all ingredients in the food process, and blend until smooth. 

For the pizza crust: 
3/4 cup luke warm water 
1/2 teaspoon yeast 
2 cups flour 
1 teaspoon salt 
Sprinkle yeast over the water and let sit for 5 minutes. Mix together salt and flour, and slowly mix in water mixutre. Blend together until it forms a ball, and knead for 5 minutes. Split into two, and roll out into a crust. If baking, roll onto parchment paper. If grilling, spray a piece of aluminum foil with non-stick spray and roll out. 

Preheat grill to high or oven to 500. 

Toppings for the pizza: 
1/2 cup purslane pesto 
1/2 cup shredded mozzarella cheese 
3 medium beets (any color) grilled and sliced 
2 ounces goat cheese, crumbled 
2 scallions, sliced 
Salt and pepper, to taste 
Spread pesto on top of pizza crust, and top with mozzarella cheese. Arrange other toppings on pizza. Place on grill, and cook on high heat until crust is browned and cheeses are bubbly, approximately 8-10 minutes. Remove from heat, slice and serve. 

Sunday, July 14, 2013

Tuscan Kale and Bean Soup

I realize summer doesn't seem like it should be soup weather, but with this nice, fresh kale to cook with, I wanted to make this traditional Italian soup. It is both light and comforting,  and my Italian husband thinks it tastes very much like something his grandmother would have made. For me, that's a high compliment. 

I used some of the curly kale in this, but any variety would work. You could also substitute spinach, if you don't have kale, but this is closer to the traditional recipe. 

Tuscan Kale and Bean Soup
2 tablespoons olive oil 
4 cloves garlic, minced
1 large onion, diced
4 carrots, thinly sliced
8 cups vegetable  or chicken stock
1 teaspoon dried basil 
1 teaspoon dried oregano
1 sprig fresh thyme
1 teaspoon salt
1 teaspoon pepper
1/2 teaspoon crushed red pepper
1 cup ditalini pasta or orzo
1 pint chopped tomatoes
1 small can canellini beans
3 cups kale, chopped
Pesto and freshly grated parmesan cheese, for garnish
In a large stock pot, saute onions and garlic until onions are soft. Add carrots, and cook 5-7 minutes until carrots begin to soften.  Add stock and bring to a boil. Stir in spice and pasta, and boil until pasta is cooked, 5-7 minutes.  Add tomatoes, beans, and kale, and simmer until kale is tender, another 20-30 minutes. When ready to serve, drop a spoonful of pesto into the bowl, and top with parmesan cheese. 


Friday, July 12, 2013

Kohlrabi Kimchi Slaw

I think I have a new favorite condiment. And it's so pretty and pink ! And super easy to make. 

I was a little stumped about what I was going to do with this kohlrabi we received in our CSA basket. I knew I could make slaw with it, but it was pretty small, so that wasn't going to be much of an option. The Bossy Acre's girls had a kimchi class the week before that I was unable to attend, so I decided to make my own. 

Now, this isn't a classic kimchi by any stretch of the imagination. It should more properly be titled "in the style of kimchi:, but hey, it works ! I added some radish for extra crunch and kick, and we have been eating it on burgers, brats, and straight out of the bowl. 

Kohlrabi Kimchi Slaw 
1 small kohlrabl, peeled and shredded 
1 large radish, peeled and shredded 
1 tablespoon rice wine vinegar 
1 tablespoon sugar 
1-2 teaspoons sriracha (depending on your tastes) 
Mix all ingredients together in a bowl, and refrigerate up to an hour before serving. Will keep in the refrigerator for several days. 

Thursday, July 11, 2013

Smoked Duck and Kale Pasta

Many years ago, I had a dish a at a restaurant in Golden, Colorado with smoked pheasant and pasta. The memory of that taste has stayed with me all these years. 

When we decided to put a duck on the smoker again this year, I wanted to use it to make this dish. And what a great opportunity to use up some of the kale we had in the refrigerator. I also used some shiitake mushrooms we had from our CSA share, so it is a really decadent dish. If you don't have access to smoked duck, chicken or even bacon would be an excellent substitution. 

And other than the time it took to smoke the duck, the rest of the dish is fast and easy to prepare ! 

Smoked Duck and Kale Pasta
3 cloves garlic, minced 
2 tablespoons olive oil 
2 tablespoons butter 
3/4 cup shiitake mushrooms, cut into strips 
3 tablespoons flour 
2 1/2 cups whole milk 
2 cups smoked duck, cut into bite sized pieces 
2 cups kale, any variety, cut into bite sized pieces 
Toasted pine nuts and chopped scallions, for garnish 
Approximately 1/2 pound linguine (splurge on freshly made here, it's worth it !)
Start water boiling for pasta while you prepare the sauce. In a large saute pan, melt together butter and olive oil. Saute garlic  until soft, then add mushrooms and saute 2-3 minutes. Add flour, and continue to stir until flour is absorbed into butter, and starts to brown. Slowly add milk to mixture, and reduce heat to a simmer. Add duck, and simmer until sauce begins to thicken. Add kale, and cook until kale is cooked through. Cook pasta according to package directions, and then toss pasta with sauce. Top with pine nuts and scallions. 


Wednesday, July 10, 2013

Shrimp and Grits with Eggs

All this, from leftovers !
We had a fabulous dinner on Saturday night at The Lyndale Tap House, but as usual, I over ordered. So, I came home with a little leftover box of some peel and eat cajun shrimp. On Sunday, I decided we needed to use up some of the copious amounts of leftovers we had accumulated in our refrigerator over the long holiday weekend, so why not start with breakfast ? Since we had some goat cheese grits left over from the smoker extravaganza on Friday, I knew I could pair those with my leftover shrimp. Add a nice, soft, over easy egg, and it's the perfect, lazy Sunday morning breakfast ! 

Of course, it would be simple enough to make from scratch as well, but why bother when you have the leftovers ! 

Shrimp and Grits with Eggs 
Here is the link for the Creamy Goat Cheese grits recipe: 
Half a pound of leftover spicy shrimp or
1/2 pound fresh shrimp, peeled and deveined 
2 tablespoons butter 
1 teaspoon cajun seasoning 
4 fresh eggs 
Salt and pepper 
Melt butter in a large, non-stick pan. Saute shrimp until just pink, then sprinkle with cajun seasoning and set aside. Heat up your leftover grits in the microwave. Use the same pan you cooked the shrimp in to cook your eggs over easy. Plate grits on first, top with shrimp, then eggs, and salt and pepper to taste. 


Tuesday, July 9, 2013

Strawberry Shortcake with Almond Cream

I have to say, this was one of the more difficult recipes for me to create, and not because it is hard to make, I just had disaster after disaster trying to get it right. 

When I was a kid, shortcake was a small, spongy thing you purchased in a six pack at the grocery store. I never cared for them. When I grew up, I used to use a Bisquick recipe, which was better, but I don't use pre-packaged mixes anymore. How hard could this be, I figured ? I know how to make cobbler, I know how to make biscuits, right ? 

Well, the first disaster was mistakenly using soda rather than baking powder in the dough, which made a decidedly bitter and acid-like cake. In the garbage they went, even though they looked perfect. The second batch of shortcakes came out perfectly, but then it was too warm in the house to get the almond cream to whip correctly. Sigh...

Lucky for me, strawberries are plentiful this time of year at the Minneapolis Farmers Market, and I have a husband who doesn't mind eating the failures. 

Strawberry Shortcake with Almond Cream 
For the shortcake: 
2 cups flour 
4 teaspoons baking powder 
1/4 cup sugar 
1/2 teaspoon salt 
2 tablespoons shortening 
2 tablespoons butter 
1/2 teaspoon almond extract
3/4 cup half and half 
1 tablespoon of butter, melted, to brush on top of cakes 
Sugar, for sprinkling on top
Preheat oven to 400. Line a baking sheet with parchment paper. Mix together the dry ingredients, and cut in the shortening and butter. Add almond extract, and slowly mix in the half and half, and continue to stir until well combined. Scoop onto baking sheet, for 8 equal sized cakes. Brush tops with butter and sprinkle lightly with sugar. Bake for 15-20 minutes until they are just starting to turn golden brown. Remove from oven and let cool. 

For the strawberries: 
2 cups fresh strawberries, hulled and sliced 
1/2 cup Grand Marnier (optional, but delicious!) 
1/4-1/2 cup sugar, depending on how sweet you like your berries 
Mix together in a bowl, and refrigerate at least an hour before serving. 

For the almond cream: 
4 ounces cream cheese, at room temperature 
1 cup heavy whipping cream 
1 teaspoon almond extract 
1/2 cup powdered sugar 
Place all ingredients in medium bowl, and whip on high speed until smooth. Refrigerate until ready to serve. 

To plate, slice shortcake in half, and place lower piece on your plate. Top with almond cream, then strawberries. Top with remaining slice of cake, and serve. 

Friday, July 5, 2013

Grilled Turnip and Pesto Pizza

Now, I know you think I am crazy. Turnips on pizza ? Well, I have never been a fan of these little buggers, but we got them in our CSA box, so I had to find a way to use them that we would enjoy. They looked and tasted a little like my golden beets that I love so much, so why not grill them and toss them on pizza ?

So, to make the rest of this come together was simple. We still had some leftover arugula pesto from last week's haul, goat cheese, because we always have that, and HELLO! One of the best grilled pizzas I have ever made ! 

Grilled Turnip and Pesto Pizza

For the crust: 
3/4 cup lukewarm water
1/2 teaspoon yeast
2 cups flour
1/2 teaspoon salt
**This makes two thin crusts. Sprinkle yeast over the water, and let it rest for 5 minutes. In a large bowl, combine flour and salt. Slowly add yeast mixture, and work together until it forms a ball. Turn onto a floured surface and gently knead for 5 minutes. Separate into 2 pieces. If grilling, spray a piece of foil with non-stick spray and roll out crust to approximately 1/4 inch. If baking,  roll out on parchment paper. 

Preheat grill on high, or oven to 500. 

For the pizza:
3-4 small turnips, greens cut off
2 tablespoons olive oil
Salt 
Pepper
1/2 cup pesto
1/2 cup parmesan cheese
5 ounces goat cheese, crumbled
Balsamic vinegar, to taste
Salt and pepper, to taste
Toss turnips with olive oil, salt and pepper. Preheat grill to high, and place directly on grates. Grill, turning frequently,  until evenly charred on all sides. Remove from grill and let cool enough to handle. Remove charred outside and thinly slice. Spread pesto over top of crust. Top with parmesan cheese, and then turnip slices. Distribute goat cheese crumbles evenly over everything.  Place pizza on the grill or in the oven. Bake or grill 10-15 minutes until golden brown and cheese is melted.  Top with balsamic vinegar,  salt and pepper,  to taste. 


Wednesday, July 3, 2013

Angel Hair Pasta with Arugula Pesto

We realized, after trying to finish off the last of our CSA box before the next one arrives, that we have not historically been big eaters of the greens. Coming up with creative ways to use them has been quite a challenge, but a fun one, for sure. I knew I could make pesto out of some of them, and at least I could freeze that and use it later, so nothing would go to waste. 

That was part of the bargain I made with myself (and my husband) when we agreed to join the CSA. Nothing could go to waste. We have a garden of our own, but most of it goes to supply our canning habit and stock our shelves for the year with sauces, salsas and condiments. We decided to supplement with the CSA so we have fresh veggies all summer long. 

So, pesto is a good (and tasty!) way to use up the last of these greens before I go pick up our next box of treasures. I added basil to this batch, because we had some, but you could easily use straight arugula and it would be fine. I also added garlic because we like our pesto that way. That's the great thing about pesto, you can make it your own ! I topped this with grilled chicken and some shaved Parmesan, but it would be fabulous plain, it's just that good ! 

Angel Hair Pasta With Arugula Pesto
4 good size hand fulls of fresh arugula (I filled my 4 cup food processor twice) 
2 hand fulls of fresh basil 
1/2 cup almonds 
4 cloves garlic 
4 tablespoons olive oil 
2 ounces shaved Parmesan cheese 
1/2 teaspoon salt (optional, to taste)
1/2 pound angel hair pasta 
Start your water boiling for the pasta, and salt the water generously. In a food processor, combine all of the pesto ingredients and process until smooth, or you can leave it a little chunky if you like it like that. Taste, and stir in salt if you prefer it. Add pasta to boiling water, and cook 3-4 minutes, just until al dente. Drain pasta, return to pan, and add 1/2 cup of the pesto, and stir. Add more if you like, plate, and top with grilled chicken, and more shaved Parmesan. 

Tuesday, July 2, 2013

Grandma's Snap Pea Salad

Sometimes, the classics are the best. This time of year, when the sugar snap peas are fresh from the garden, I always think of this salad my grandma used to make. It's so delicious and easy, other than shelling all the snap peas. But, it let's you take a few minutes to sit outside in a chair, with a big bowl, and your freshly picked (or in my case, selected from the Minneapolis Farmer's Market) peas, and relax, shell, and enjoy an early summer afternoon. 

The combination of ingredients for the dressing on this are almost "pickle-like". You can add more veggies if you want to, but this is the traditional combination we had, and it wouldn't be Grandma's if I didn't make it this way. 

Grandma's Snap Pea Salad 
2 cups freshly shelled sugar snap peas, rinsed and lightly blanched 
4 hard boiled eggs, chopped 
1/2 cup yellow onion, chopped 
2 tablespoons fresh dill, chopped 
1/2 cup mayonnaise 
1 tablespoon apple cider vinegar 
1 tablespoon sugar 
1 teaspoon salt 
1/2 teaspoon black pepper 

To blanch the peas, start a pot of water boiling, and add the peas. Bring back to a boil, and cook for just 1-2 minutes, until peas are all floating and turn bright green. Immediately remove from heat and drain. Run cold water over the peas until they are completely cooled. Let them drain well, and place in a medium sized bowl. Add remaining ingredients, and stir together. Refrigerate at least one hour before serving. 

Monday, July 1, 2013

Kale and Oyster Mushroom Risotto

We are slowly edging our way to the end of our first CSA basket, and it's a good thing, because another one is due this week ! We elected to have a monthly delivery of mushrooms added onto our regular stock of vegetables, so we could have something extra with our usual fare. This month's selection was some dried oyster mushrooms. After they were rehydrated, they were big and meaty, and we had the left over liquid, so I didn't want to waste that. For some reason, risotto came to mind, and I could also use up some of the plentiful greens we had received. The hearty kale made this a perfect Sunday night supper. 

Risotto isn't hard to make, just time consuming, but it yields a delicious, creamy dish that is truly comfort food at its best. I have offered some substitutions so you can make this vegetarian, if you like.

Kale and Oyster Mushroom Risotto
2 tablespoons butter 
1/2 cup scallions, diced finely 
1 cup mushroom water (or use dry white wine if you are using fresh mushrooms) 
1 cup arborio rice 
4 cups vegetable or chicken stock 
2 cups kale, roughly chopped 
1 cup oyster mushrooms, sliced 
2/3 cup parmesan cheese, grated
Start your stock simmering in a sauce pan on a back burner. In a large saute pan, melt butter. Saute scallions until soft, then add mushroom water (that you used to rehydrate dried mushrooms) or white wine, and reduce to half. Stir in rice, and continue to stir until most of the liquid is absorbed. Keep your rice mixture on a medium simmer, and add stock one half cup at a time, stirring constantly. Stir until most of the liquid is evaporated before adding the next half cup. The process will take approximately 1/2 hour. Just before adding the last cup of stock, stir in the kale. Then, before the last 1/2 cup, stir in the mushrooms. Continue to cook until the liquid is mostly absorbed and the rice is creamy. Stir in the parmesan cheese and remove from heat. Let rest for 5 minutes, and serve.