Search Recipes

Wednesday, May 30, 2012

Chicken Bratwurst Kebabs

This is the third of the experimental Gold'n Plum chicken sausage recipes. I was a little stumped about what to do with chicken bratwurst, other than just grill and eat them! 

All of these chicken sausages I received from Gold'n Plump were not pre-cooked in any way, so the challenge, especially with a chicken product of any kind, is to make sure they are thoroughly cooked before you consume them. 

I can usually trace back a thought process for how I come up with a recipe, but I have to say I can't recall how this popped into my head, but somehow I knew this would turn out. And really, what a great way to expand your budget, I got 15 kebabs out of one package of brats!

Chicken Bratwurst Kebabs
This is the before grilling shot
To prepare the bratwurst:
1 12 ounce can or bottle of beer (any kind will do)
1 package Gold'n Plump chicken bratwurst

Place brats and beer in a saucepan, and simmer until brats plump and cooked through, about 30 minutes. Leave in pan and let cool completely. Remove brats from beer, and refrigerate until ready to assemble the kebabs.
For the vegetables:
1 package ranch dressing mix
1/2 cup rice wine vinegar
1/2 cup olive oil
1 teaspoon black pepper
1 each, red, yellow and green bell pepper, cut into chunks
1 pound button mushrooms (larger ones can be cut in half or quartered)
1 fresh pineapple, cut into chunks

Mix together the ranch dressing mix, rice wine vinegar, olive oil and pepper. Place in a one gallon plastic bag, and add peppers and mushrooms. Coat all, and place in refrigerator for 3 or more hours, or overnight. Do not add pineapple to marinade.

When ready to assemble, slice the bratwurst into 1 inch chunks, then arrange peppers, mushrooms, pineapple and bratwurst on skewers. Grill for 5-7 minutes on each side, until browned.

My apologies for the quality of this final picture. Between the smartphone camera and the picnic cocktails, the quality is not the best !


Tuesday, May 29, 2012

Grilled Sausage and Tortellini Soup

I decided to try another of the Gold'N Plump chicken sausage package I was asked to sample. This was is a parmesan Italian sausage. I tossed this on the grill with some other items, but as usual, we had WAY too much food to eat, so we had a massive amount of leftovers. 

These weren't spicy like the other sausages we had, they were fairly mild in flavor, but had that nice char from grilling. I thought about re-purposing them on a pizza, but it was a cold, rainy day, so soup sounded like a better idea. 

I just threw this together with ingredients we had on hand, and it was a great way to use up the left over sausage. We always have home canned spaghetti sauce on hand, but store bought will do as well. And yes, I really did use frozen tortellini ! I know...not homemade pasta, but it was quick, easy, and tasty on a rainy summer night.

Grilled Sausage and Tortellini Soup
1 package Gold'n Plump Chicken Parmesan Italian Sausage
2 tablespoons olive oil
1 small onion, diced
1 large green pepper, diced
2 cloves garlic, minced
1 quart spaghetti sauce
4 cups water
4 tomatoes, diced
1 teaspoon dried oregano
1 teaspoon dried basil
1 teaspoon salt
1/2 teaspoon pepper
1/2 teaspoon red pepper flakes
1 package frozen, prepared tortellini
Grated parmesan cheese, for garnish

Grill or cook sausage, according to package directions, let cool and slice. In a large dutch oven, saute onions, green pepper and garlic in olive oil until soft. Add spaghetti sauce and water, and bring to a boil. Reduce to a simmer, add tomatoes and spices, and stir. Add tortellini, and simmer until tortellini are puffy and soft, about 30 minutes. Serve with freshly grated parmesan cheese;

Sunday, May 27, 2012

Honey Blackberry Frozen Yogurt

It's going to be a hot one out there today, so I wanted to make something cool and fruity to enjoy.

I purchased blackberries on sale, and they were so plump and sweet, but as I normally do, I bought more than we could eat. I decided making a frozen dessert would allow me to use them before they spoiled. Combined with our honey, I have to say this is one of my best inventions for the ice cream maker so far. And the color is really fabulous !

Honey Blackberry Frozen Yogurt 
2 cups fresh blackberries
1/2 cup honey, divided
2 cups plain yogurt
1 teaspoon vanilla extract
1/4 teaspoon almond extract

Place blackberries in a blender with just enough water to make them liquefy, and blend. Strain to remove all of the seeds. Place the blackberry puree in a saucepan, along with 1/4 cup of honey, and simmer on low until reduced by half. Cool to room temperature. In a separate bowl, combine yogurt, remaining honey, and vanilla and almond extracts. Place mixture in ice cream maker, and process according to manufacturers directions. When the yogurt is half way through the freezing process, add the blackberry puree. Freeze for 1-2 hours before serving.

Mango Honey Crisp

I found this recipe last year sometime, the source seems to be from http://sdoeden.areavoices.com/, although I am not quite sure. I have made this so many times, I have it committed to memory.

I generally like to use local ingredients for my dishes, but both Ray and I love mango. I can satisfy my locavore need by using honey from our hives, which I did for this dish. And this is so simple to make, I had it put together and in the oven in under 10 minutes.

I wished I had taken a picture earlier, when it first came out of the oven. As you can see, Ray really enjoyed it. This was all that was left this morning.

Mango Honey Crisp 


2 fresh mangos, peeled and diced (about 4 cups)
1/2 cup honey
1/4 cup butter, at room temperature
1/4 cup brown sugar
1/2 cup flour
1/2 cup flaked coconut
Pinch of salt

Preheat oven to 375. Toss mangos with honey, and place in a buttered 8 by 8 baking dish. Combine remaining ingredients until crumbly, and spread over the top of the mangos. Bake for 30-40 minutes until golden and bubbly. Let cool for 10-15 minutes before serving warm with ice cream or sweetened whipped cream.

You can easily double this for a 9 by 13 pan, or divide into 4 individual ramekins.

Saturday, May 26, 2012

Caprese Juicy Lucy Sliders

I was asked to sample some new chicken sausages from Gold'N Plump, and develop some recipes using this new product. I am always up for a challenge, but when I received this big box of sausage, I have to admit I scratched my head a bit. 

The real challenge for me was to make it something other than just a sausage. Of course, I could make pasta, or a pizza, or some other standard fare, but I wanted to make something truly unique. 

We have recently been gorging ourselves on caprese salad, thanks to a massive purchase of fresh basil at the farmers market, so I decided I could incorporate those same ingredients with the spicy Italian chicken sausage and make something really unique. Even I was surprised at how easily this dish came together. The stretchy, gooey mozzarella cheese inside the sausage "burgers" was really fun to eat!

Caprese Juicy Lucy Sliders
1 package Gold'n Plump Spicy Italian chicken sausage
4 ounces fresh mozzarella, cut into 6 cubes
1 pint grape tomatoes
2 tablespoons balsamic vinegar
6 large fresh basil leaves
6 small ciabatta buns, buttered
Salt and pepper

Remove casings from sausages, and place meat in a small bowl. Divide
into 6 small portions, and place a cube of mozzarella cheese in the middle of each one.


Flatten out to make a burger shape, making sure the cheese is completely covered.


Place grape tomatoes a small, ovenproof (and grill proof) pan, and drizzle with balsamic vinegar.


Salt and pepper to taste. Put the tomatoes on the top rack of a hot grill, stirring frequently. When the tomatoes start to burst, place the sausage patties on the grill.
Grill approximately 6 minutes, then turn. Remove the tomatoes from the top rack, and place the buns, buttered side down, on the top rack to brown. After an additional 5 minutes, remove everything from the grill. Let the sausage patties rest, while you puree the tomato mixture. Assembly the burgers, using the tomato mixture like a relish, and place one basil leave on each one.
Can you see the gooey cheese inside ?


Thursday, May 24, 2012

Crunchy Swai with Basil Goat Cheese Potato Puree

It was destined to be a rainy evening, so I had to take a night off from grilling. Rainy weather always makes me want comfort food, and nothing is more comforting than mashed potatoes.

I had a big package of fresh basil left from my farmers market run, and it was on its last legs, so I had the choice of making pesto, or finding another recipe in which to use it. I remembered seeing an episode of "Barefoot Contessa" where she made a potato puree with basil, so I thought I would make up a version of that for our dinner. Ray likes the combination of goat cheese and basil, so I combined the two. It is heavenly, and the silky texture of the potatoes was a nice contrast to the crispy swai filet.

Crunchy Swai with Basil Goat Cheese Potato Puree
For the potatoes:
2 cups fresh basil leaves
1 pound Yukon Gold potatoes, peeled and diced
4 ounces goat cheese
1/2 cup whole milk
2 tablespoons butter
1 teaspoon salt
1/2 teaspoon pepper

In a large saucepan, bring 8 cups of water to a boil. Add basil leaves, and cook approximately 1 minute until they are bright green, then immediate immerse in a bowl of ice water. Remove and pat dry, and then chop the basil. Set aside. Add potatoes to the same pot of water, bring to a boil, and boil until they are very tender. Add basil leaves back to the potatoes, and then add the remaining ingredients. Puree with immersion blender or hand mixer until very smooth. Cover and let sit while you prepare the fish.

For the fish:
4 4 ounce swai filets
1 cup bread crumbs
3 tablespoons lemon pepper
1 teaspoon dill weed
1 teaspoon salt
1 teaspoon garlic powder
2 tablespoons olive oil
2 tablespoons butter

Mix together the bread crumbs and spices on a plate. Press fish filets into crumb mixture until both sides are well coated. You can do this while the potatoes are boiling. Put olive oil and butter in a large, non-stick skillet and heat until bubbly. Add the filets, and cook approximately 3-4 minutes per side, until golden brown. Serve over the potato puree.

Wednesday, May 23, 2012

Italian Grill with Gnocchi

The weather was absolutely perfect, and I wanted to make the entire meal outside. I had planned some grilled Italian sausage with peppers and onions. I needed something to go with it, and we bought this new grill with one of those side burners, so pasta was not off the table! 

Normally, I would serve sausage with peppers and onions with a crusty roll, so the closest thing we had was gnocchi. I started a pot to boil on the burner, and got to cooking!

Italian Sausage Grill with Gnocchi
1 pound Italian sausage
1 each red, yellow and green pepper, sliced thinly
1 large sweet onion, sliced thinly
1 pound prepared fresh gnocchi
2 cloves garlic, minced
Olive oil
Butter
Salt
Pepper
Parmesan cheese (optional)

To prepare for grilling:
Place the peppers and onions in a foil packet and toss with olive oil, salt and pepper. In a large bowl, combine garlic, 2 tablespoons of olive oil and 2 tablespoons of butter, and bring outside (this is for the gnocchi after it is cooked).

Preheat your grill on high, and start your side burner. Of course you can cook your gnocchi inside, but you will probably need a tag team! Place onion and pepper packet on grill first, and turn every 2-3 minutes for about 10 minutes. Then place sausages on the grill, and move the foil packet to the upper rack. When the water for your gnocchi, begins to boil, add the gnocchi, and cook for 7-8 minutes, until tender. Drain gnocchi and toss in the bowl with the garlic, olive oil and butter. Remove cooked sausages, and onions and peppers from the grill.

Assemble your dish with the gnocchi on the bottom, top with onions and peppers, then slice sausage and spread over the top. You can add parmesan cheese at this point if you like.


Tuesday, May 22, 2012

Huevos Rancheros Pizza

I think for the summer we may be replacing our soup and sandwich night with grilled pizza night ! I am having so much fun creating different combinations of pizza now that we always have crust ready to go in the refrigerator.

This one I imagined while sitting at my desk this morning. I had this jar of spicy green salsa left at my house after a brew date yesterday, and I was really hungry for eggs and cheese, for some reason. Those three ingredients together spell huevos rancheros to me ! The rest is pretty simple from there.

We put our pizza stone on the grill this time, to try to better control the heat, and the eggs came out perfectly, even if the pizza looks a little bit like it is staring at you. It was sooooo good !

Huevos Rancheros Pizza 
Next time I'll arrange the peppers to look like eyebrows!
1 prepared pizza crust
1/2 cup spicy green salsa
3/4 cup shredded cheddar cheese
1 large roasted red pepper, cut into strips
2 medium eggs

Preheat grill on high, or oven to 500*. Put pizza stone on grill or in oven, If grilling, spray a piece of foil with non-stick spray. Place pizza crust on foil. Spread salsa on crust, and top with cheese. Arrange pepper strips so that you create a "well" for the eggs. When grill or oven is hot, place the pizza on the stone, then slowly place the eggs on the pizza. Bake for 8-10 minutes just until the eggs are set. Remove from heat. Salt and pepper if desired.

Monday, May 21, 2012

Sriracha IPA Dip

I have a dip recipe that I have used over and over again, because it is just that good. Normally it's a no brainer. But this time, I just grabbed a beer out of the refrigerator to add to the recipe, and it was very bitter. Well of course it was, it was an imperial IPA. In an effort to rescue my dip, I started adding ingredients. Honey didn't work, in fact, it seemed to amplify the bitter taste. Then, I thought about something spicy ! So I grabbed my trusty stand-by, sriracha. And now, this is a dip I can save for the archives. It is really unique. Serve with pretzels, and your favorite IPA!

Sriracha IPA Dip


2 packages cream cheese, softened
1 cup IPA (the hoppier the better)
2 tablespoons honey
1 tablespoon sriracha
1 package ranch dressing mix
1 teaspoon dill
1 cup shredded cheddar cheese

Mix cream cheese and beer together until smooth. Stir in remaining ingredients. Refrigerate overnight to let flavors marry. Serve with pretzels or chips.

Popcorn Salad

Yes, that's right, Popcorn Salad ! Someone brought something like this to my wedding last year, so I wanted to try to recreate something similar.

It reminded me a bit of the Spring Salad that everyone was making a few years back, except with popcorn instead of pasta. So, I used that as my base, and worked out the details from there. It is truly different, but you may have to do some selling to get people to try it !

Popcorn Salad 


2 cups celery, diced
2 cups carrots, diced
1 cup onions, diced
1 small can water chestnuts, sliced
1/2 cup chives, chopped
2 cups mayonnaise
2/3 cup sugar
1 tablespoon vinegar
1/2 teaspoon pepper
1 cup bacon, cooked and crumbled
1 cup shredded cheddar cheese
12 cups popcorn, popped and salted (purchased, bagged popcorn is fine)

Mix together the first nine ingredients, and refrigerate overnight. Just before you are ready to serve, stir in popcorn, bacon and cheese. Sauce will be absorbed by the popcorn.

Friday, May 18, 2012

Spicy Basil Chicken

I have to thank one of my fellow food bloggers, Krysten Schwartz at http://mrsschwartzkitchen.blogspot.com, for the inspiration for this dish. She does something called "Take Out Fake Out" and posted a basil chicken recipe that made my mouth water!

I had a ton of basil, thanks to a visit to the Farmers Market last week, so I wanted to try this. I made a couple of changes, because my husband doesn't care for the strong taste of soy sauce. And, oddly enough, we were out of white sugar, because we had to feed the bees ! So this is my version of Spicy Basil Chicken. It was a perfect mid-week dinner for us.

Spicy Basil Chicken 
1 1/2 pounds boneless, skinless chicken breasts, cut into bite size pieces
3 cloves garlic, finely minced
1/2 cup basil, cut chiffonade* see note
Salt and pepper
2 tablespoons peanut oil for cooking

For sauce:
1/2 cup ponzu
2 tablespoons brown sugar
1 tablespoon corn starch
1 tablespoon sriracha (more if you like it spicier)


Generously salt and pepper chicken.Prepare sauce and set aside. In a large saute pan or wok, heat oil, and add garlic. Saute until garlic is tender. Add the chicken, and cook until it is no longer pink. Add the sauce, and stir until sauce thickens (just a few minutes). Stir in the basil at the last minute, and serve over rice.

*Note: To cut basil chiffonade, stack several leaves on top of each other. Roll them together tightly, and slice thinly. They look very fancy, but it is very simple !

Monday, May 14, 2012

Grilled Cauliflower with Parmesan Cheese and Fresh Herbs

In celebration of our new grill, and our monthly anniversary, I thought I would try a different grilled cauliflower recipe.

This is a new thing for me, because I really thought I didn't like cauliflower very much. But, my exposure to it had been limited to raw, served with various dips, or cooked within an inch of its life, and served with a cheese sauce. Then I discovered grilling it...

This preparation was so easy, and an excellent addition to the garlic rubbed steak I had planned for dinner. Served with milk stout, it was our reward for planting the entire garden in one day.

Grilled Cauliflower with Parmesan Cheese and Fresh Herbs
1 head of cauliflower, cut into bite size pieces
1-2 tablespoons olive oil
Salt and pepper
2 ounces parmesan cheese, shredded
1/2 cup freshly chopped herbs (I used tarragon and parsley, but you can experiment and use whatever you have on hand)

Toss cauliflower with olive oil, salt and pepper. Make a large foil packet, and seal cauliflower inside. Place packet on grill, and roast, turning frequently, for about 30 minutes. Remove cauliflower from packet into a large bowl, and toss with parmesan cheese and herbs.

You can also roast in the oven, just place cauliflower on a sheet pan, and roast at 400 for 30-40 minutes, then toss with cheese and herbs.

Sunday, May 13, 2012

Tomato, Goat Cheese and Basil Pizza on the Grill

Here is pizza number two from our Saturday night pizza grilling feast. Again, we used the new book we received from Zoe Francois for the crust recipe, and tried to make a unique combination of ingredients from what we had on hand. This was my husbands favorite of the evening, the goat cheese is a nice change of pace from the usual pizza toppings.

Tomato, Goat Cheese and Basil Pizza on the Grill
1 prepared pizza crust
1 tablespoon olive oil
2 cloves garlic, minced
1/2 cup shredded mozzerella cheese
2 roma tomatoes, sliced
3 ounces goat cheese, crumbled
8 basil leaves, chopped
Salt and pepper to taste

Spray a piece of foil with non-stick spray. Place crust on the foil. Spread the olive oil over the crust, then top with the minced garlic. Scatter the mozzerella cheese over the top of the garlic, then top with tomatoes, goat cheese and basil. Bake pizza on hot grill for 8-10 minutes. Season with salt and pepper to taste.

Grilled Pizza with Caramelized Onions, Blue Cheese and Whole Eggs

When I attended the last food blogger event, each attendee was given the Artisan Pizza and Flatbread in 5 Minutes a Day cookbook, and had a demo by Zoe Francois on how to toss pizza. I have been itching to give it a try at home ever since.

We purchased a new grill, and we grill pizza all summer long, so this was a way to put the two together. I have to admit, I am not much of a pizza tosser, my fear prevents my pizza from getting too much height. I have a vision of the pizza crust hanging from the track lighting in the kitchen, but we did a passable job.

This first one was topped with caramelized onions, blue cheese and a whole egg, then we drizzled some balsamic vinegar over the top after we took it off the grill. It was a really unusual, delicious pizza.

Grilled Pizza with Caramelized Onions, Blue Cheese and Whole Egg
Love the whole eggs on the pizza !
1 pizza crust
2 medium onions, thinly sliced
2 tablespoons butter
1 tablespoon olive oil
1/2 cup shredded mozzerella cheese
3 tablespoons blue cheese, crumbled
2 fresh eggs
Good balsamic vinegar
Salt and pepper

Prepare pizza crust according to directions. In a large saute pan, melt together butter and olive oil until bubbly. Add onions, and saute over medium heat. Stir occasionally until onions are golden and caramelized.

Place pizza crust on a piece of foil sprayed with non-stick spray. Scatter mozzerella cheese over the top of the crust, and top with the caramelized onions. Add the blue cheese, and carry your pizza close to the grill. Top with the eggs, gently. Bake on the grill for 8-10 minutes just until the eggs are set. Lightly drizzle with balsamic vinegar and season with salt and pepper to taste.

Thursday, May 10, 2012

Slow, Confusing Dinner at Victory 44

I wanted to take my husband out for date night, and we chose Victory 44 because it wasn't far from home. And, we are big fans of Travail, so one of our friends told us the food and experience were similar, and some of the chefs had previously worked at Victory 44. It seemed like a place we should try.

We were seated right away, which was nice, but it was early and a weeknight. We received water, a wine and beer list, and a brief explanation of how ordering works. So far, so good. Then, the wait begins...

The hostess noticed no one had stopped by our table, and graciously offered to get our wine ordered. A few minutes later, the server appeared at our table with glasses and our bottle of wine. She asked if we had questions about the menu, so I asked about the chicken liver pate they had available. The server didn't appear to know very much about it, which was, unfortunately, to become the theme for our evening. She said she had not tried it, but the other servers had told her it was "like candy". It was served with a kind of a cracker, by her explanation. I hesitated a bit, and she told me the portion was quite small, so we could easily get two starters.

So, I ordered the pate, and Ray ordered the "Devils on Horseback". Then, we waited over half an hour before we heard back from the server. She assured us our selections were on the way, and they appeared about 5 minutes later.

The Devils on Horseback were blue cheese stuffed dates, wrapped in bacon, and served with a blue cheese "cheese whiz" and some sort of brown gel that the server struggled to describe. We still don't know what it was, exactly. And some candied marcona almonds. The dates themselves were well prepared, and the blue cheese whiz was really amazing, but if you took a bite of everything together, it was cloyingly sweet.

The chicken liver pate was sublime. Well, the pate part of the dish, was sublime. The rest of it was a little disjointed, at best. The "cracker" the server described was actually a piece of puff pastry, that was crumbly and difficult to eat with the pate. It was served with compressed rhubarb, an asparagus gelee that had no flavor at all, a walnut gastrique that was more of a gel, and a walnut brittle. It was difficult to get a bite of all the components together.

In retrospect, we should have ordered our entrees at the same time as our starters, but we ordered those when we received the starters, not knowing the delays that awaited us. It was over 45 minutes before we even saw the server again, who wanted us to know the kitchen was very small, and "slammed", and she was doing what she could to get our entrees out as soon as possible. Ten minutes later, she said she was standing behind the chef, asking where our dishes were, and apologized. Good thing we had ordered a bottle of wine...

When our entrees arrived, they were, well, confusing. The server didn't know the names of all of the components on the dishes, so we were guessing at some of them. Ray ordered a pork tenderloin, which had compressed potatoes, compressed rhubarb, a charcoal vinaigrette, and some other sauce and powder on the plate, we weren't sure what they were. The tenderloin was cooked perfectly (as you would expect from a restaurant with photos of pigs all over), but overall it wasn't anything exciting.

I ordered the turkey meatloaf, which the server described as, well, a meatloaf. It had compressed nettles (there was a lot of compression going on in the kitchen that evening), white asparagus, a truffle sauce (she couldn't remember what kind of sauce), and some microgreens. Oh, and a piece of something she described as "ham, only kind of like bacon." There was another sauce on the plate as well, which she failed to explain, along with some lovely sauteed morels. The meatloaf had an odd texture, and after a few bites, we could only determine that it had some organ meats ground up in the mix. It would have been nice to have that in the description. It was sorely under seasoned, as were the nettles, and the ham/bacon-like meat was extremely salty. If you put all of the ingredients together in one bite, it still had an odd flavor and texture.

We asked, when our meal was delivered, if we should order dessert now, because of the long wait, and the server assured us that the dessert station wasn't nearly as backed up as the dinner, so we could take our time. That was a mistake. We finished our dinner, and waited another 15 minutes before our server came to take our dessert order. And another 25 minutes for the dessert to arrive...the wine was already gone at this point.

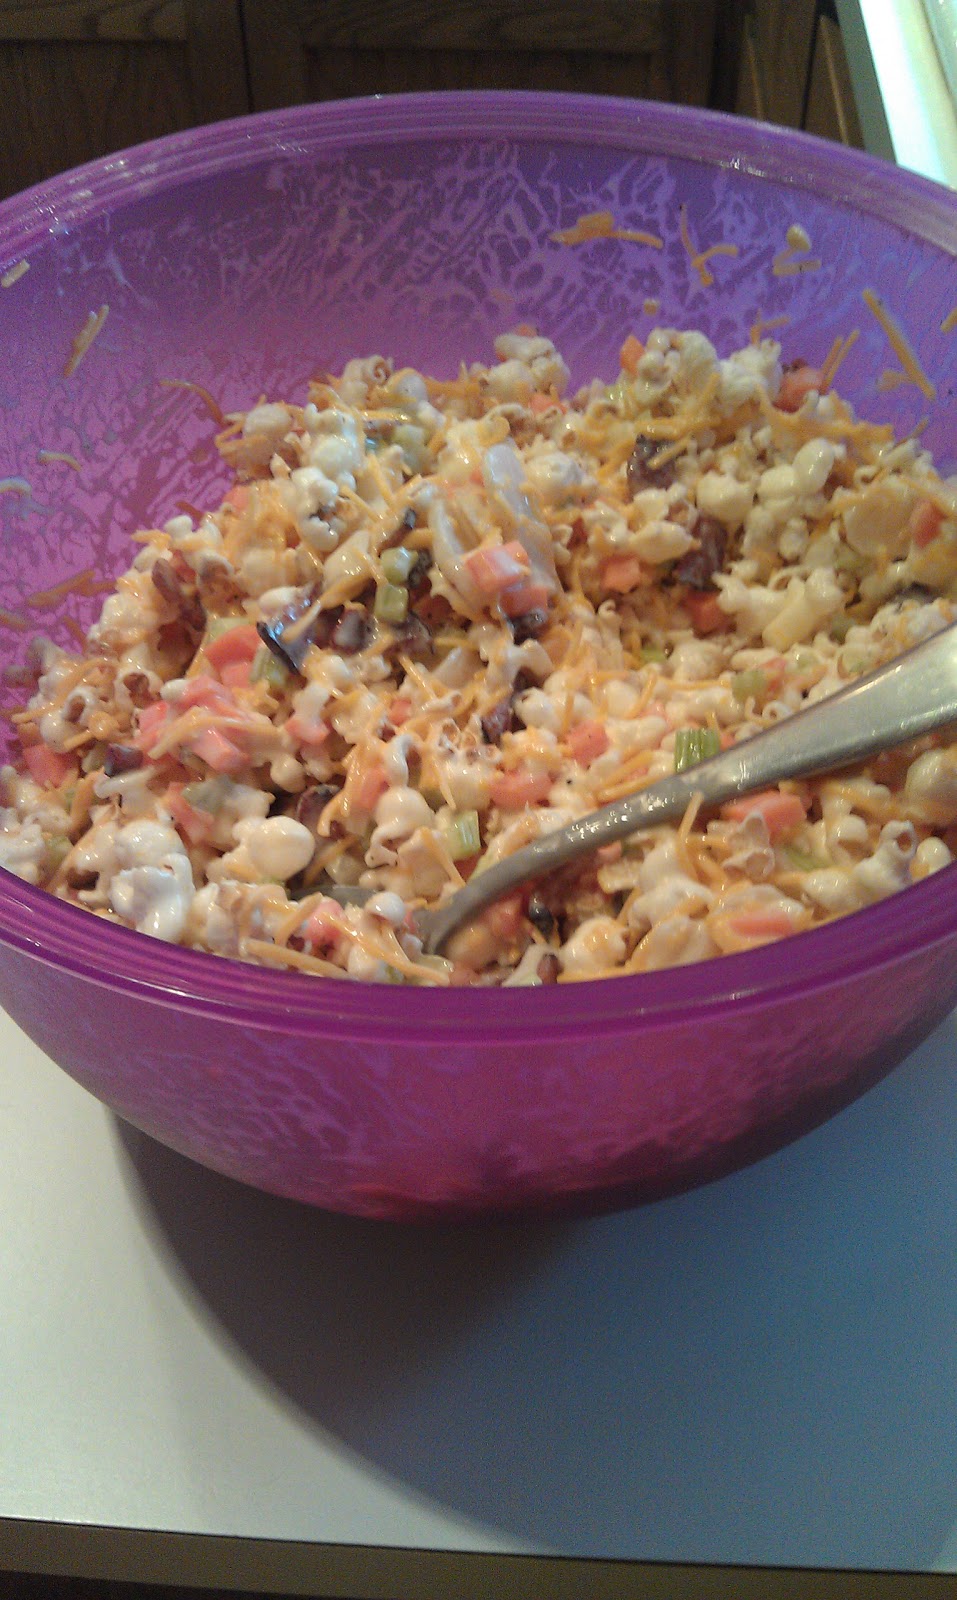
The dessert we chose was movie theatre snacks, which consisted of two balls of frozen creme brulee coated in caramel corn, salted popcorn with hollandaise sauce, chocolate crunch balls, and a Twizzler soda. The frozen creme brulee tasted more like just a frozen custard, and the caramel corn could have use more caramel, and salt, to play up the sweet and salty contrast they were going for. The popcorn and hollandaise was just odd. We did like the crunchy balls, and the vote was split on the Twizzler soda. Ray liked it, I thought it tasted like a medicine I remembered as a child.

All in all, with the delays in service, lack of explanation regarding what was on our plates, and hit and miss food, it was a less than satisfying dining experience.

And I wanted to love it, I just didn't. But the wine was really, really good.


Wednesday, May 9, 2012

Butter Sauteed Swai

I have to admit, I had no idea what kind of fish this was.

It was on sale, so I bought it. Seriously, you would too, for $5.99 for two pounds, and the filets were quite large. I have a favorite dish I prepare quite often, fish and lentils, so I used this fish in that preparation. I have to say, I was very impressed with the buttery texture and mild taste of this fish. To me, the true test of a fish is whether it can stand up to a simple preparation, like a pan saute with butter, salt and pepper. This one passed with flying colors!

I did a little research...this is related to the catfish, and is quite popular because it is farmed in an ecologically responsible fashion. This makes me happy, because I really liked it. And with the price being so reasonable, I will be looking for other ways to incorporate this into our menu over the summer.

Butter Sauteed Swai
1 pound swai filets
2 tablespoons butter
1 tablespoon olive oil
Salt
Pepper
Lemon

Heat butter and olive in a non-stick saute pan until bubbly. Salt and pepper both sides of filets. Cook 3-4 minutes on each side, just until golden. Serve with lemon.


Sunday, May 6, 2012

An Apology and refund from the Manchu Wok

For those of you following this story...

I was shortchanged after my lunch last Monday at the Manchu Wok downtown. I posted my experience here, and I also wrote a note to their corporate office, and so did several of you ! (Thank you!)

I received, in the mail to day, a hand written note from the owner of the franchise, which reads:

"Dear Lisa,

I am sorry for giving you a bad experience on Monday. I should have trusted you as a customer and handed you your change back. Please accept this $10.00 included.

Signature, Sue"

So, I got back my change, plus what I spent on my lunch, and an apology, after having to contact the corporate office. I still won't go back there again....

Thoughts?


Thursday, May 3, 2012

Bacon, Avocado and Roasted Red Pepper Sandwich

This is a very simple, tasty sandwich that is always a welcome addition to our soup and sandwich nights. I have to give some big kudos to Hackenmueller Meats, who smoked our pork belly, and made some of the best bacon I have ever eaten ! If you have never tried it, you should!

Bacon, Avocado and Roasted Red Pepper Sandwich
3 sliced smoky bacon, cooked crisp
1 avocado, sliced
1 roasted red pepper sliced
4 pieces wheat bread, toasted
Mayonnaise

Assemble sandwiches, and enjoy with your favorite bowl of soup.

Golden Beet Borscht

I have posted before about my love for golden beets, and this recipe will certainly reinforce that.

I also love borscht, but had been warned about making it at home, because of the danger of staining your counters with the beets. Logic told me there was less danger of staining with these golden beets, and the flavor is also much more delicate. The color, unfortunately, reminded me of the fake yellow chicken gravy we used to get in junior high ! Don't be put off by that, however. It is quite delicious.

Thanks to our Ukrainian friend, Stephanie, for this very traditional borscht recipe (and I did take a couple of liberties...).

I paired this with a sandwich of bacon, avocado and roasted red pepper (recipe follows)

Golden Beet Borscht


10 cups chicken stock
5-6 large golden beets, boiled, peeled and shredded (wear gloves!)
1 large onion, diced finely
2 cloves garlic, minced
2 large carrots, diced finely
2 stalks celery, diced finely
2 large potatoes, diced into 1/2 inch cubes
3 cups shredded cabbage
1/2 cup fresh squeezed lemon juice
Salt and pepper
Sour cream and fresh dill

In a large stock pot, bring chicken stock to a simmer. Add onion, beets and garlic, and simmer for 15 minutes. Add carrots, celery and potatoes, and simmer an additional 15 minutes. Add cabbage, and simmer just until tender, approximately 5 minutes. Stir in lemon juice, and season with salt and pepper. Serve topped with sour cream and dill.


Wednesday, May 2, 2012

Fish Salad with Pickled Baby Corn

About once a week I try to make a sweep through the refrigerator and make dinner out of whatever I find there. We laughingly refer to this as the "Chopped Refrigerator Challenge", after the Food Network show.

I have been obsessed with pickled vegetables lately, ever since I did a quick pickle for banh mi sandwiches last week. I wanted to put something on this salad that had that crunch, pickly taste, and I found I can re-use that pickling mixture over again, so why not !

The fish I chose here is tilapia, because it is easy to find, and we almost always have it in the freezer, but any firm white fish will do.

Fish Salad with Pickled Baby Corn 
First, mix the vinaigrette:
1 tablespoon soy sauce
1 tablespoon pickling liquid from baby corn
1 tablespoon hot Chinese mustard
2 tablespoons honey
2 tablespoons olive oil
Blend together until emulsified. Set aside

For the salad:
2 cups baby spinach leaves, stems removed
2 cups iceburg lettuce shredded
2 radishes thinly sliced
1/2 green bell pepper, diced
1/2 small white onion, diced
1 roasted red pepper, diced
1/2 cup pickled baby corn (you can purchase this or make your own, see the venison banh mi recipe for instructions)

For the fish:
2 6 ounce tilapia filets
Orange or lemon pepper
Salt
1 tablespoon butter
1 tablespoon olive oil

Arrange the salad ingredients on 2 dinner plates, in the order listed, and drizzle with vinaigrette. Set aside.
In a non-stick pan, melt butter and add olive oil, over medium heat. Season fish on both sides liberally with salt and pepper. Cook 2-3 minutes on each side until golden. Place filet gently on top of salad.